I have noticed for quite some time that the floor on the north side wall of my house has always been cold in the winter. This is how I stopped the cold air from blowing into my house.
How to air seal an old house from the outside is explained below.
There are many different ways to accomplish air sealing when building new construction. The same procedures for new construction can be used when you do a total gutting and bring the house down to bare studs.
The way I will explain in the rest of this article is how I did it from the outside and also did a insulation upgrade.

Why air seal
The reason to air seal is to save money on heating cost (heating is a large reason for me) and also it makes the house more pleasant to live in because the cold spots are gone.
I live in a cold climate and when it was -2 Fahrenheit which equals -19 Celsius I used a infrared camera and took some photos.

These photos show that I have always had air infiltration coming in at the bottom of the inside wall. This house was built in 1983 with common building practices at the time. I wonder how much money in heating cost was wasted because of this one defect.

Description of the project
The house is a single story wood frame house with a full basement made with concrete blocks.
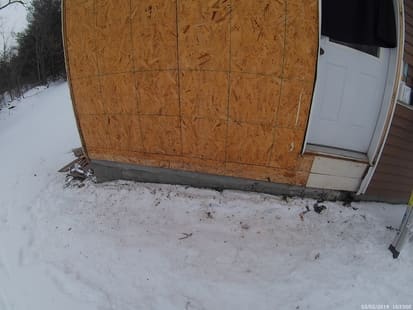
The siding is vinyl clapboard style siding that comes in 8-inch wide strips 12 foot long and the sheeting is OSB oriented strand board. *
The target area for air sealing is elevated above the ground by 24 inches
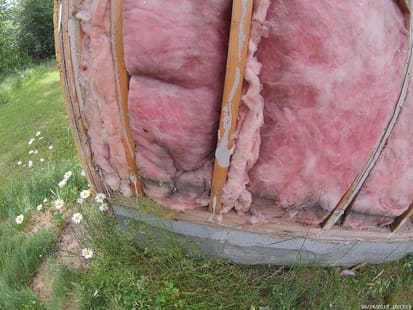
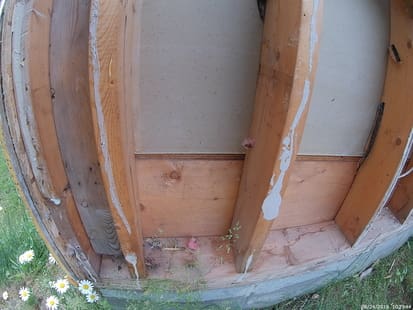
Why is there air blowing under the wall
Air is coming in from a number of spots along the wall of this house.
- The OSB sheeting is installed without the vertical seams being taped or caulked.
- The upper and lower horizontal seams are not sealed with tape or caulk.
- The windows and doors are installed without tape or caulk.
- The OSB itself will let air penetrate because of the way it is made.
- The insulation in the walls is fiberglass rolled batts.
Blower door test results
The blower door test results showed just how much air leakage we have in the house. A blower door test depressurizes the house and measures the amount of air is coming into it from the outside.
The test is recorded at a CFM-50 number which means how many cubic feet a minute of air is moving out of the house under a depressurization of 50 pascal which is a measurement of air pressure
Without going in-depth into the calculations my house normal reading would be at #1950 at CFM-50 My house hit the #3859 number meaning it is very leaky.
You can find people who do blower door test when you search for Energy Auditor Companies. The company will come out and do
Step 1, Remove the siding and expose the sheeting
Removing the vinyl siding is not hard to do. To remove the siding start at the top and work your way down. If you want to learn how to start removing the siding with a common screwdriver check out this link https://howtosquirrel.com/8-easy-steps-to-unlock-and-remove-vinyl-siding-without-a-siding-removal-tool/
Remove any additional insulation or house wrap.
Remove the soffit to expose the upper part of the sheeting. This is required for the air sealing of the top of the sheeting and installing the new house wrap.
Step 2, Replace, remove or resize any windows and doors
Now is the time when you can replace your windows with more efficient ones. I chose to turn a door into a window, remove a door, increase the size of one window and replace another window.
The window I am replacing is in the kitchen over the sink and we can feel the cold air in the winter when the north wind is blowing. I installed a cheap window before I discovered the amount of money good windows and air sealing could save.
The door I am taking out and installing a window in its place is in bedroom #1. The window is large enough for egress or to crawl out in case of fire. Here is a infrared photo of what is happening when it is -2 Fahrenheit outside.
The door I am removing and turning into
Step 3, Air seal and weather seal the windows and doors in the wall
To air seal the windows and doors will be done from the inside of the house. You will need to remove the trim around the windows and using window and door spray foam foam the gap around the sides. If the window is sitting on the rough sill then use caulk to seal the bottom of the window to prevent air from blowing into the house.
On the outside of the house use a rubberized flashing tape or a sealing compound with fiber mesh tape to seal around the edges of the door and over the nailing flanges of the windows.
I used a product called “zip tape” which is very sticky and a rubber product. This tape is available “off the shelf” in the local building supply stores and works in cold weather.
Step 4, Air seal the seams of the sheeting and the upper and lower edge of the sheeting
This step is just as important as the sealing around the windows. I used a flexible, spreadable product that is available “off the shelf” and can be used in cold weather. The product that I spread over the seams is a petroleum-based roof repair coating because of the outside temperature. If I was working on this project when the temperatures were over 50-f I would be using a water-based product for air sealing.
Step 5, Install house wrap and tape the joints with house wrap tape
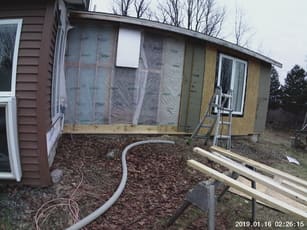
I installed the house wrap so it hangs down onto the concrete blocks. Any seams and along the window edges will be taped to provide protection from water and diverting any direct wind exposure. The upper part of the house wrap will adhere to the top of the sheeting with the same material I used on the seams.
The house wrap sounds like overkill for air sealing but every little part plays its part in accomplishing the goal.
Step 6, Install additional insulation to the outside of the house or install the siding
This is the perfect tome to add additional R-value to the walls by attaching foam insulation.
I buil out the trim around the windows to match the additional polyisocyanurate sheet insulation and siding thickness. The insulation sheeting will be installed in 2 layers overlapping the joints to produce a more complete air and thermal barrier.
Once the exterior insulation has been install another layer of house wrap will be installed on top of the insulation to protect it from water in the form of condensation off the siding. The next item to be installed is furring strips to hold down the house wrap and also the furring strips is where you can reattach the vinyl siding.
A metal mesh screen or bent metal (mouse guard) like drip edge should be placed along the bottom of the furring strips to keep insects and rodents from making a home behind the siding.
photo
I will post an update with the infrared photos and blower door test once the entire project is completed
I encourage you to pursue your passion and have fun whenever you attempt a new project.
Good luck and best wishes
Gary 2/6/2019

