I was removing some vinyl siding so I could fix a broken piece. I thought it would be helpful to others to write about how to do it without a siding removal tool and with an ordinary screwdriver and a hammer.
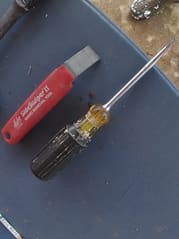
How to unlock and remove vinyl siding using an ordinary screwdriver and hammer.
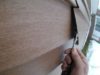
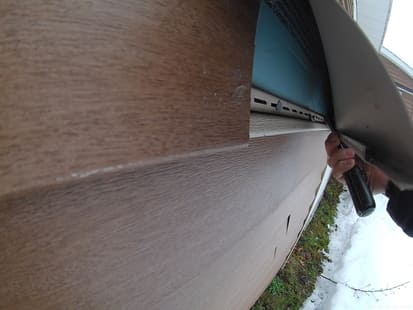
To unlock a section of vinyl siding using only a screwdriver, find the end joint, insert the screwdriver into the bottom locking edge and pry down and out on the edge until you can grab and pull the bottom edge outward and unlock the corner, slide the screwdriver along the entire bottom edge of the siding unlocking the bottom flange.
This is easy and, with some practice, is a fast process. Putting the vinyl siding back together is a little tricky, and I have tried to describe the process in this article.
How to unlock and remove a section of vinyl siding
- Locate the bottom corner of the piece of siding on top of the siding you are going to remove; you will need to unlock the upper siding along the entire length of the lower piece of siding you are trying to remove. This will expose the nailing flange and the nails holding the piece of siding you are trying to remove. You will be unlocking more siding than you are replacing to expose the entire top flange.
2. Insert the screwdriver into the bottom locking edge and pry down and out on the edge until you can grab and pull the bottom edge outward and unlock the corner.
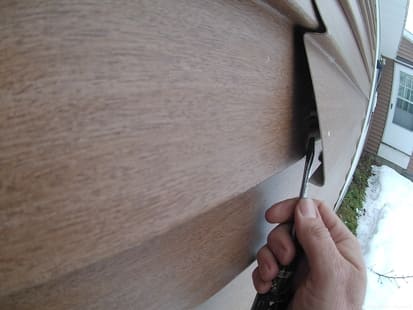
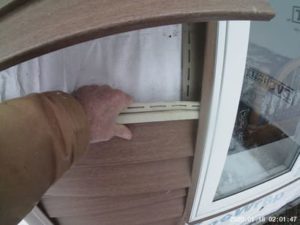
3. Slide the screwdriver along the entire bottom edge of the siding. You might need to do this step on the second piece of siding that is covering the lower sidings nailing flange.
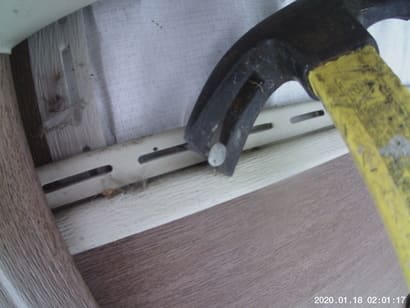
4. While holding up the upper siding to expose the nailing flange on the siding you are trying to remove, take the claw side of the hammer and pull out the nails. (a small pry bar or flat bar will make this step much easier) There should be a nail every 16 – 24 inches.
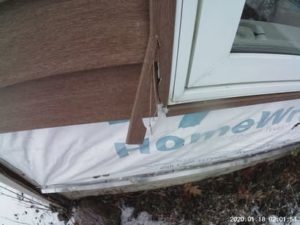
6. Grab onto the top of the siding you are trying to remove and give it a (jerk) in a downward motion unlocking it from the lower siding.
How To Reinstall The Vinyl Siding
- Take the new piece of siding you are trying to install and cut it to the length of the old siding you are replacing. If your new piece is a short section, you will need to cut the damaged spot out of the old siding. When you cut the damaged spot out, make the cut out 3 inches less than the new piece. (if your new piece is 18 inches long, then you will only remove 15 inches from the old piece) This 3-inch allows for the 1 ½ inch joint overhang that is required for expansion and contraction to keep the edge joint covered with siding.
- Insert the bottom edge of the new siding under the edge that was overlapping the original siding (if you forgot which side was overlapping, look at the rest of the wall). Into the nailing flange of the lower siding and pull upward. You will feel it click in. Holding onto the bottom with your fingers, try to pull it outward to you; if it does not come out, then it is locked in. ***if your siding edge slips into the J channel, you can bow the siding to slip into the J channel or fold back the J channel, be careful not to break the J channel if you are folding it back***
- Roll or lift the piece of siding above the one you just replaced and use the old nail holes as a guide to where the siding should be. Nail the top flange of the new siding with the nails you removed, or use new nails. Place the nails in the center of the slot and leave the nails a little loose. You will notice that the holes are slotted. This is for the movement of the siding when the temperature changes. (expansion and contraction) **** (If the siding did not have these holes, then when it got warm and expanded, you would no longer have a smooth wall, and it would have waves in it) *****(These waves will happen if the nails are driven tight into the nailing flange also).
- Reinstall the lower edge of the upper siding into the nailing flange of the siding you just installed. Start at the overlapping end, with your fingers bent down the edge until you can get it over the lip of the nailing flange, and work the siding along the edge, locking it into place. You may need to use the palm of your hand and, in a downward motion, strike the siding clicking it into place. If you can not get the edge to click in, you may need to use the screwdriver to start the edge. *** sometimes this is not an easy task, but it can be done***
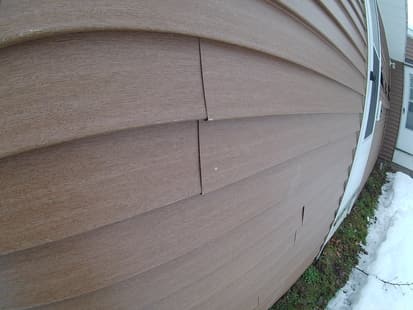
The older the siding, the more likely it is to crack because it becomes brittle.
This has to do with the Ultra Violet rays of the sun. If you are working on the south or west of your house, the siding is more likely to crack.
The thickness of the siding affects its cracking when you are working on it.
The more expensive sidings are more likely to be thicker; the thicker the siding, the less likely it will crack when you are working with it. Also, the thicker siding may be harder to work with because it is stiffer.
The outside temperature will affect the siding also
If it is frigid outside, we are talking below 30 degrees; this will make the siding more likely to crack when working with it.
The new siding may be a different color.
When the siding is exposed to the elements and sunlight, it has a tendency to fade and get dirty from pollution and algae growth. If your repair siding is a match to your old siding, consider yourself lucky.
You may not need to replace the broken siding using this method
If all you have is a small hole in your siding, you can always slide a small piece of siding behind the hole.
- You still need to unlock the bottom of the siding that is over the hole; see step #1
- Remove the nails directly above the hole so you can pull out that part of the siding.
- Get a small section of siding (about 6 inches) and remove the upper nailing flange and bottom locking edge.
- Slide the modified piece of siding behind the siding where the hole is located. (you may want to use some clear silicone caulk to glue it in place)
- Install the nail you removed and refer to step # 8 to reinstall the bottom of the upper siding.
Helpful hint:
- If you are going to remove the entire wall of siding, start from the top and work your way down. By removing the upper section of the siding, you will expose the lower siding nailing flange with every section that is removed.
- For some of the thinner siding, you can grab the top of the siding and pull the siding off without pulling the nails. You should only do this method if you are not planning on reusing the siding because it tears the nailing flange.
I hope this has been some help to you, and good luck
Gary 11/26/18 updated 1/3/21 1/7/23