Why does my toilet keep running and how to stop it
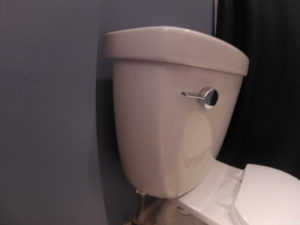
I have had to repair toilets that keep running or run every few minutes. Let us see if I can help you solve your problem.
Why does my toilet keep running? Most toilets keep running because the fill valve, flush valve or flapper is not operating properly. In the rest of this article, I will try to explain how you can discover what needs to be fixed and how to stop the toilet water from running.
Can this running cause any problems
- Excess water usage which cost $$$
- Excess water in your septic system which could saturate your leach field. A leach field is the last part of a septic system that takes the water from your septic tank and lets it soak into the ground. If you live on a public sewer system this will not affect you.
- Toilet tank sweating.
What are the parts of the toilet
A toilet is a simple machine with a few moving parts.
- Bowl
- Tank and Lid
- Fill Valve
- Flush Handle
- Flush Valve and Flapper
- Seat
How a toilet works
The toilet works with the principal of siphoning action. That is a fancy way of saying the weight of the existing water pulls the remaining water and stuff out of the bowl down into the sewer drain.
The inside of the bowl was formed at the factory with a channel that has the shape of an “s” laying on it’s side. You may be able to see the shape on some toilets if you look down at the side of the base where the toilet bowl mounts to the floor.
The flush handle is attached to the flush valve flapper inside the tank. When you push the handle down it lifts up the flapper and releases the entire tank of water into the bowl. The bowl fills up and the water goes over the channel “s” and creates a siphoning action and draws the rest of the water out.
If you release the tank water at a slow rate this siphoning action will not happen, the tank water must be released at a fast pace for the siphoning to take place.
After the tank water has been empty the flapper drops back down over the flush valve hole and new water is released into the tank and the bowl to fill it back up again by the fill valve. When the new tank water reaches a predetermined height in the tank the float on the fill valve will close down the fill valve stopping the water.
You are ready to start the whole process again with the next flush.
What kind of toilet problem do you have
Let’s figure out what part of the toilet you need to look at and fix.
- Does the toilet continue to run after the flush and stop when you jiggle the handle?
If you have this happening the part of the toilet to look at is the flush valve. Most likely it will be the flapper is not seating properly. The cause of this issue is from the connecting chain from the handle or the rubber flapper needs replacing. What you need to do is remove the tank top and look to see if the connecting chain is free moving. If the chain is free moving then replace the rubber flapper.
- Does the toilet run every few minutes or every few hours even if it is not used?
If you have this happening then you need to look at the flush valve again. Remove the tank top and flush the toilet to empty the tank of water. Reach into the tank and with your finger feel to see if the rim of the hole the rubber flapper sits on is smooth and clean. If there is sand or rust around the rim then cleaning the sand out of the tank should fix the problem. If you feel an uneven spot or edge on the edge of the rim where the rubber flapper sits on then the flush valve has a crack in it and it needs replacing.
- The toilet continues to run even after you jiggle the handle.
If you have this issue it could be the flush valve rubber flapper is not seating correctly. The first thing to do is turn off the water supply to the toilet for a few minutes. This is testing to see if the rubber flapper is letting the water bypass it. If the water level drops then replace the rubber flapper. Rubber flappers are cheap and really easy to replace. If replacing the rubber flapper does not solve the problem then you need to look at the fill valve.
If it is the fill valve the float may be out of adjustment/broke or rust or sand that has lodged inside of the fill valve. The first thing you need to do is look to see if the float is getting caught anything like the side of the tank or if it stays under water after the tank is full. Lift up on the float with your finger, if the flow of water stops. If all you need to do is move the float up just a little then the float is out of adjustment, if you got to pick the float up more than a ¼ inch then the float may have cracked letting water inside and needs replacing.
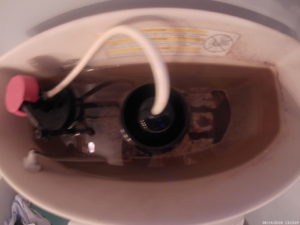
How to adjust the float
There are two types of floats, the float on the metal arm and the float that slides up and down on the fill valve stem.
To adjust the float on the metal arm you just bend the arm. These arms are made out of a soft metal and will bend. The best way is to unscrew the arm from the valve so you don’t break the valve and then screw it back in place. If you are willing to take a risk you can bend it without removing the arm from the valve. I have adjusted them this way.
To adjust the float that slides up and down on the fill valve for most you will need a common screwdriver and at the top of the valve, you will see the adjusting screw. Turning the screw clockwise will lower the water level in the tank.
Adjust the water level to the recommended level, there should be a mark on the inside of the tank.
Do I need a plumber to replace the fill valve
Replacing a fill valve is not hard. If you are willing to give it a try you should be fine. You will need a few tools and make sure the water supply is turned off.
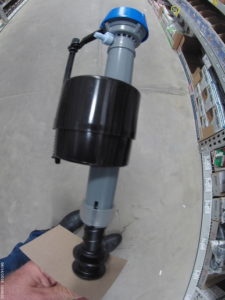
How to replace a fill valve
Read the instructions that come with the new part
The fill valve is located inside of the toilet tank and is mounted thru the bottom of the tank. The water supply line is connected to the fill valve at the bottom of the tank. The fill valve fills the tank with water and stops the flow of water at the proper height by a float that operates the internal parts of the valve. The things that go bad with this part is the float and dirt may cause the valve not to shut off.
The tools you will need to replace this part:
- Pliers, adjustable plumbers work best
- Adjustable wrench or correct size wrench for the supply line
- Shop vac is nice to remove all the water out of the tank, towels work too
- Old towels for spilled water
- The correct fill valve for your toilet
Make sure you have the correct fill valve for your toilet. Most toilets have the same type of fill valve, but yours might be the odd one. Double check. A fill valve that float slides up and down most likely will work in place of a valve that has a float on the arm.
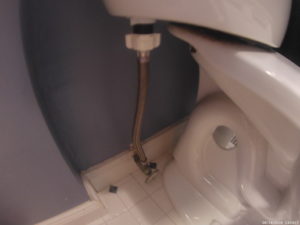
The first thing you will want to do is turn off the water supply to the toilet. One should find the shut-off valve under the left side of the toilet. Now remove the tank top and flush the toilet. If you don’t see or hear the water running into the tank filling it back up you are in good shape, if you see water still flowing into the tank you will need to shut the water down to the bathroom or the whole house. Find where the main water supply line comes into the house and shut the valve off at that point.
*If you can not find a shut-off valve anywhere for the house you may need to hire a professional to install one and while they are there have them install the fill valve.
Once the water supply is turned off empty the tank of any remaining water with the shop vac or towel.
Using the pliers or wrench unscrew the supply line to the fill valve at the bottom of the tank. This will be located on the left. When you remove the supply line some water will spill out of the valve, about a quarter cup, this is normal.
Now locate the large nut that holds the fill valve to the tank. This nut is right above the water supply line you just removed. Most of the new nuts have little wings on them so you can unscrew them with your fingers or a set of pliers. Remove this nut and the fill valve should pull up and out of the tank. Notice where the little plastic pipe is attached to the water overflow on the flush valve, you will need to put the new one in the same spot. If you do not put it back in the same spot when you flush your toilet the bowl will not fill with water for the next flush.
Read the instructions the new fill valve came with.
Now insert the new fill valve back into the hole where the old one came out of. Make sure the rubber washer is located in the same spot as the old one.
Tighten up the nut on the bottom. Now make sure the little pipe is placed into the overflow or your bowl will not refill with water.
Reattach the supply line and turn on the water. Make sure you have no leaks.
Adjust the water level to the recommended level, there should be a mark on the inside of the tank.
This whole process should take less than an hour
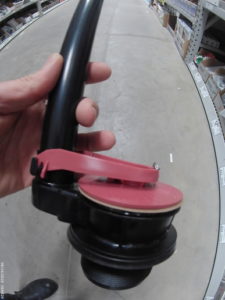
Do different toilets have different flush valves
Yes, different toilets have different flush valves. Some flush valves are larger and have a larger rubber flapper. You will need to remove the tank top and look and see what kind you have
How to replace the rubber flapper
Read the instructions that come with the new part
The rubber flapper is one of the easiest and least expensive items to replace.
- Take the tank top off
- Locate the rubber flapper and make sure you have the correct one. There will be a chain or plastic connection to the handle
- Turn off the water supply. If your good you can do it with the water running
- Disconnect the handle from the rubber flapper
- The rubber flapper should be held on to the flush valve with little ears that hook onto the flush valve, remove rubber flapper and replace.
- *** It would be wise to inspect the area “rim” where the rubber flapper sits on for any chips, cracks or debris that may be on the rim. If the rim has any cracks or chips on it the flush valve should be replaced to correct your problem.
- Hook up the connecting rod or chain to the handle
- Turn the water back on
This whole process should take less than a quarter hour
How to replace a flush valve
Read the instructions that come with the new part
Tools required
- Adjustable wrench or correct size wrenches for the water supply line and tank bolts
- A screwdriver that fits the tank bolts on the inside of the tank
- Shop vac or towels to remove excess water out of the tank
- *New tank bolts and washers would be a good idea but are not required
You will need to turn the water supply off to the toilet to replace the flush valve. There is no way around this
- Turn the water off and remove the top of the tank
- Flush the toilet and hold the handle down until the water drains out of the tank
- Suck the water out with the shop vac or use a towel
- Remove the water supply line from the tank
- There are 2 tank bolts that hold the tank to the bowl, there should be a nut on the underside of the tank and inside of the tank you should see the screwdriver head. Remove the 2 bolts
- Lift the tank straight up and off the bowl
- Remove the thick rubber cushion washer from the bottom of the tank, this will give you access to the large nut that holds the flush valve into the tank
- Remove the large nut and remove the old flush valve.
- Install the new flush valve, tighten the large nut “snug” too tight and you will break it
- Place the thick rubber cushion back on the bottom, set the tank back on the bowl and insert the tank bolts
- Tighten the tank bolts “snug” too tight and you will break the tank. You may need to replace the rubber washers on the tank bolts to get them to seal properly and not leak. It all depends on the age of the rubber washers.
- Reattach the water supply and turn it on to fill the tank
- After the tank is full reach under the tank and feel for water leaks or drips, it would be wise to check again after an hour has gone by
This whole process should take less than an hour
Why do these things go bad
There are many reasons why these items fail. Water has different minerals and acid content from place to place that affect the rubber and plastic parts. The change of temperature with the incoming water causes expansion and contraction of the plastic parts. It is hard to tell which of these caused your part to fail.
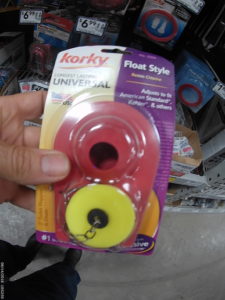
How much does a fill valve cost, rubber flapper or a flush valve cost
These parts have a different cost for different toilets. A quick estimate is between $5 to $25. The only way to know is to look at the part you have in the toilet and compare prices.
How to turn the water off if the shut-off valve does not turn or there isn’t one
One should find the shut-off valve under the left side of the toilet. Now remove the tank top and flush the toilet. If you don’t see or hear the water running into the tank filling it back up you are in good shape, if you see water still flowing into the tank you will need to shut the water down to the bathroom or the whole house. Find where the main water supply line comes into the house and shut the valve off at that point.
If you have well water you could turn the power off to the pump and relieve the pressure off the line by opening a faucet. It would be wise to turn off the water heater at the same time to prevent any damage to the heating elements if you have an electric water heater.
*If you can not find a shut-off valve anywhere for the house you may need to hire a professional to install one.
The professional will turn the water supply off at the curb stop valve outside of the house if you are on municipal water and install a shutoff valve in the supply line.
If you want to replace the toilet check out how to stop my tiolet from sweating at the end of the article.
I hope this article has helped you solve your problem
Gary
9/13/2018
Resources

